How to Create a 3D Traffic Projection from a Street Camera and Satellite Image
Anyone who has tried to align a standard surveillance camera with a city map knows this pain. You have an mp4 recording from an intersection at roughly thirty degrees to the horizon, a blurry image, and zero data on lens parameters. To calculate actual vehicle speeds or plot tracks on a map, you typically need either lidars or on-site pre-calibration with geodetic markers.
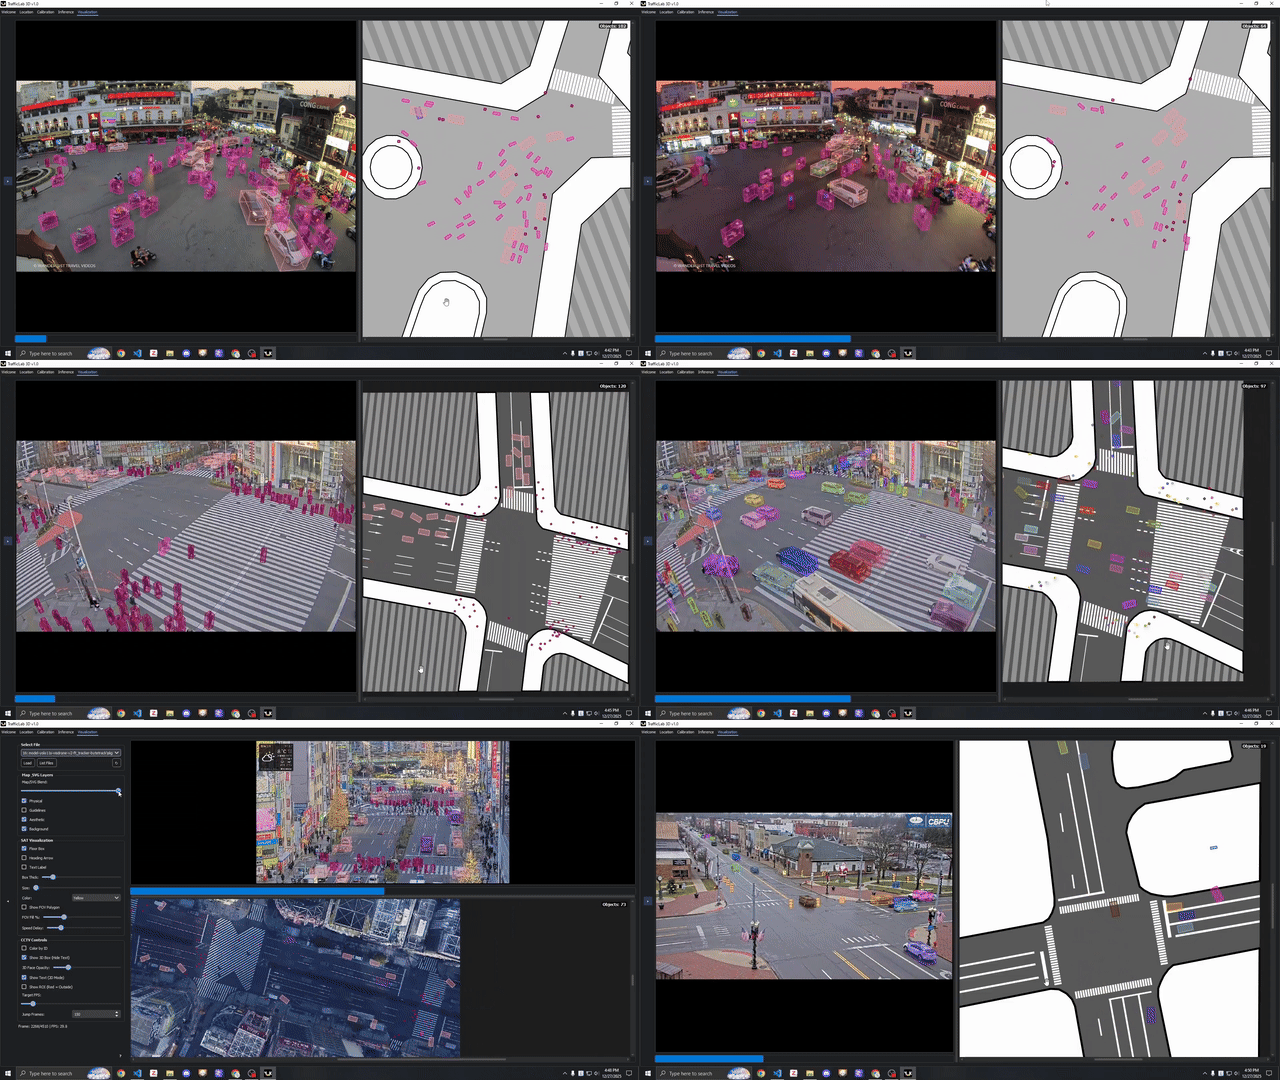
Recently I came across the TrafficLab-3D project, whose author tried to solve this problem in a very practical way. The idea is to take a standard video recording, a screenshot of the same intersection from satellite maps, and assemble a synchronized digital twin of traffic in a desktop application.
What's under the hood and why you might need it
The project is a PoC built with Python and PyQt5. It maps the flat camera image to a top-down view, elevates 2D detections into 3D bounding boxes, and simultaneously projects vehicle positions onto the map.
Such a tool would be useful for students, traffic flow researchers, or video analytics system developers who need to quickly test hypotheses without purchasing expensive equipment.
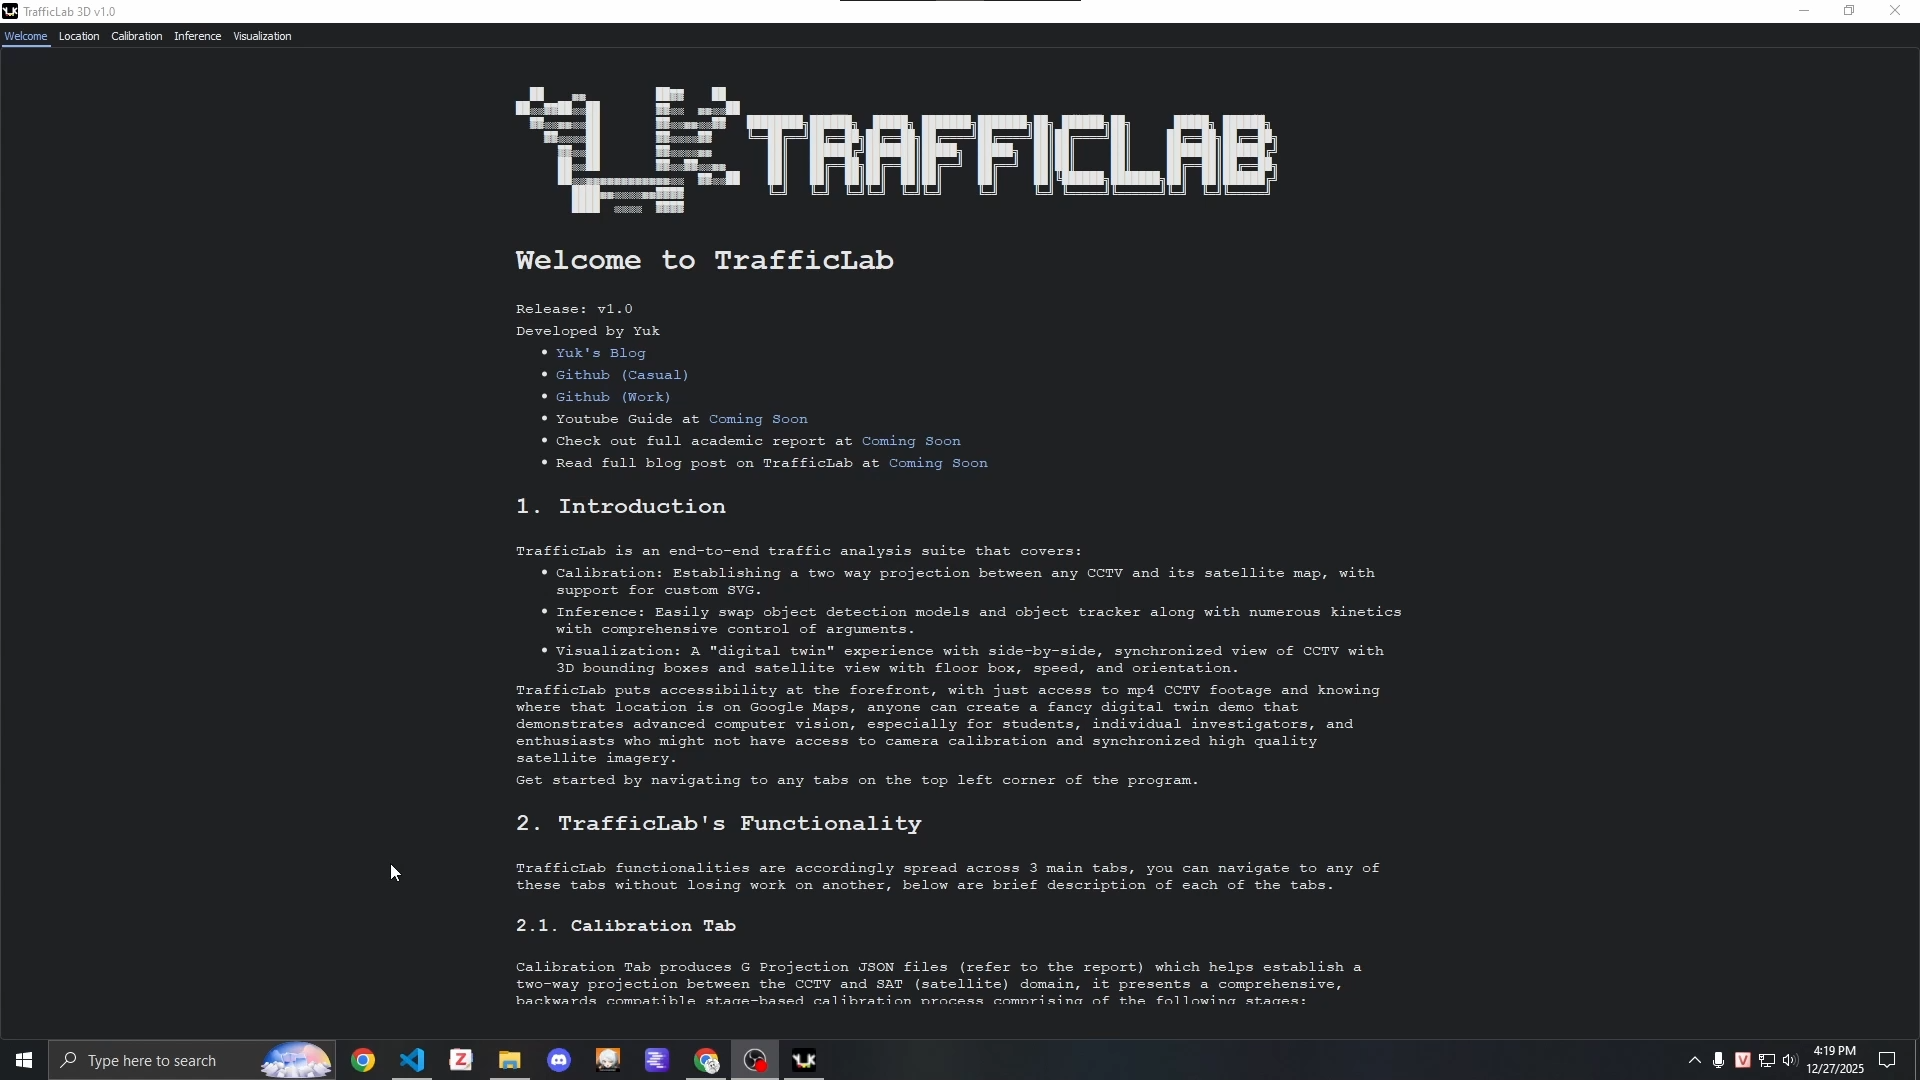
The entire workflow is split into three independent tabs: projection calibration, neural network inference, and synchronized results viewing.
Calibration without the hassle of manual matrix work
The core of the project lives in the calibration tab. To map camera pixels to real-world meters on the satellite map, the author implemented a step-by-step wizard.
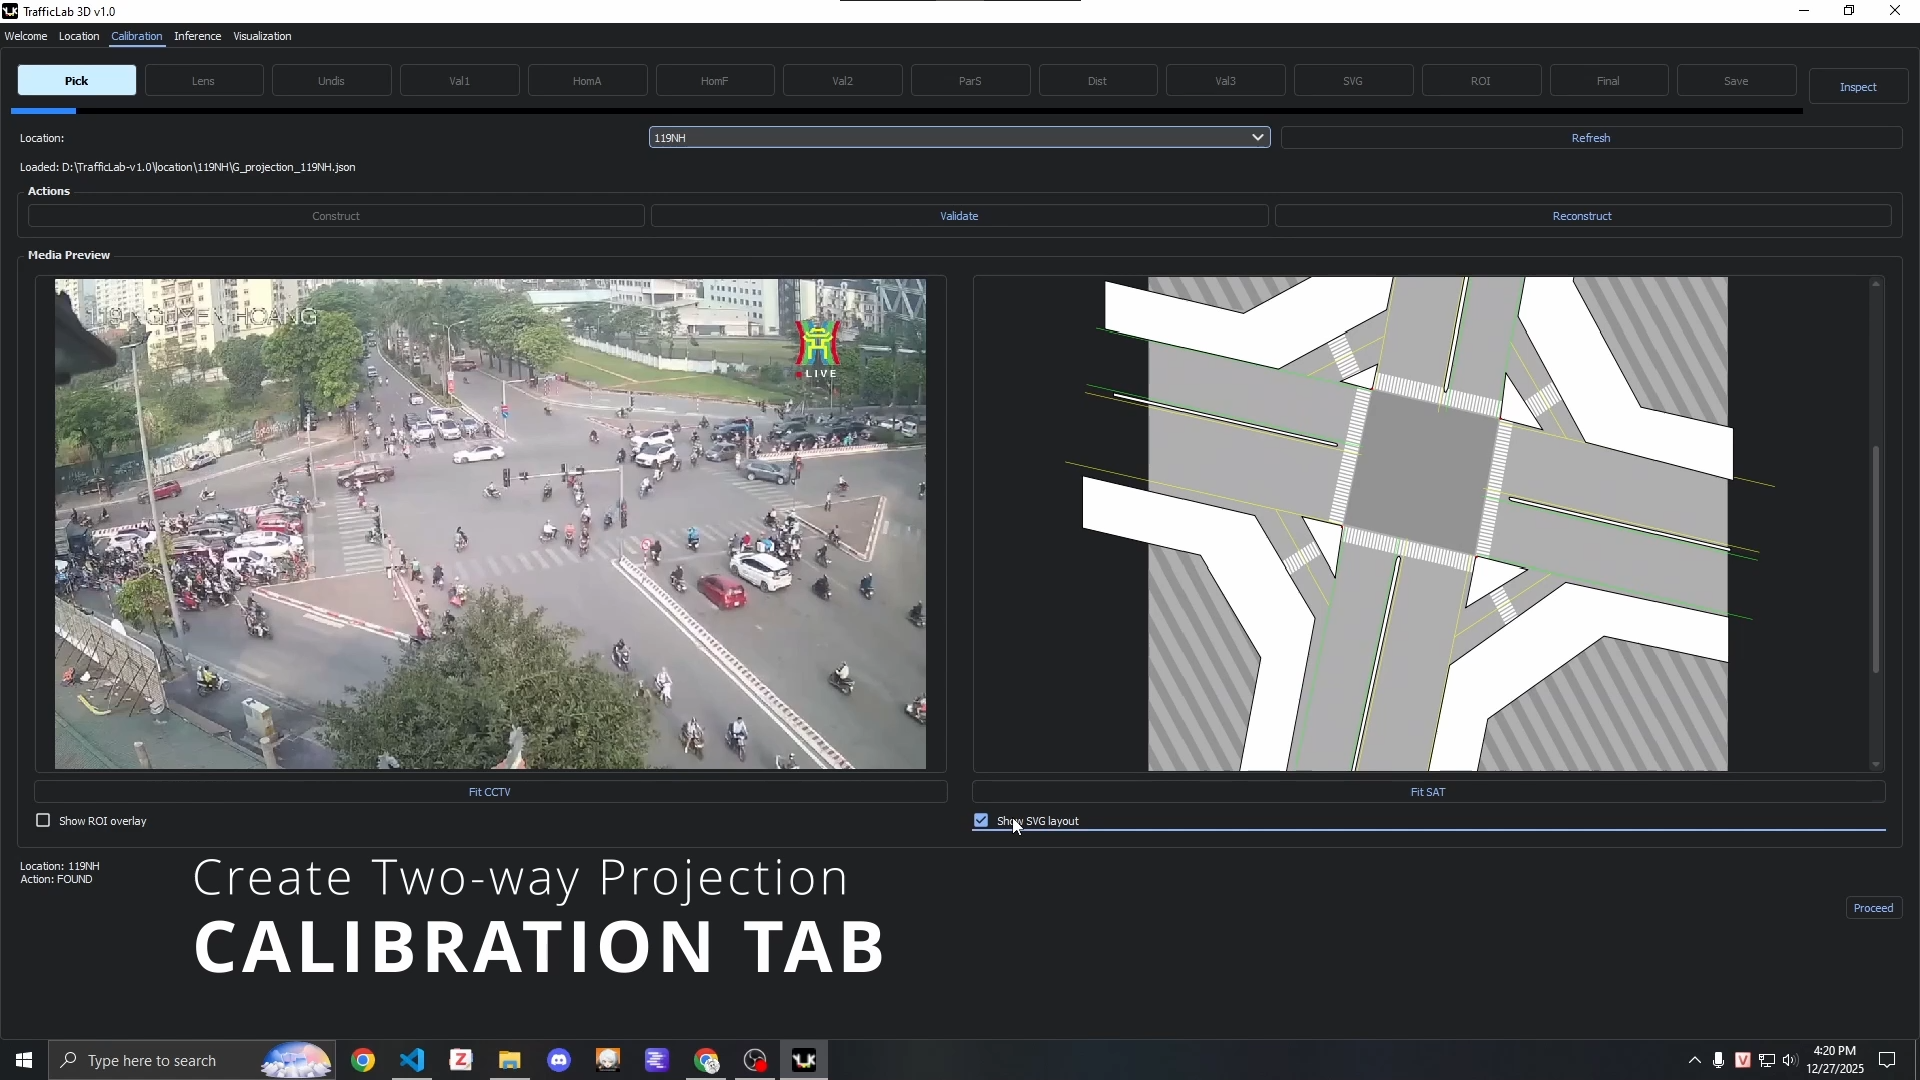
The process is divided into three sequential stages.
First, you remove lens distortion. The program configures the camera's intrinsic matrix and five radial-tangential distortion coefficients of the Brown-Conrady model. Right in the interface you can see the curved frame edges straighten out.
Next, homography is configured. You manually place reference points on the camera frame and their corresponding points on the satellite image. The RANSAC algorithm computes the road plane transformation matrix. You can immediately click on any tire-to-asphalt contact point and check where it landed on the map.
In the third stage, parallax and scale are accounted for. To go from 2D to 3D, you need to specify the height of two objects in the video (for example, pedestrians or poles) and the distance between landmarks on the map. From this data, the program calculates the camera's position in space and the pixel-to-meters conversion factor.
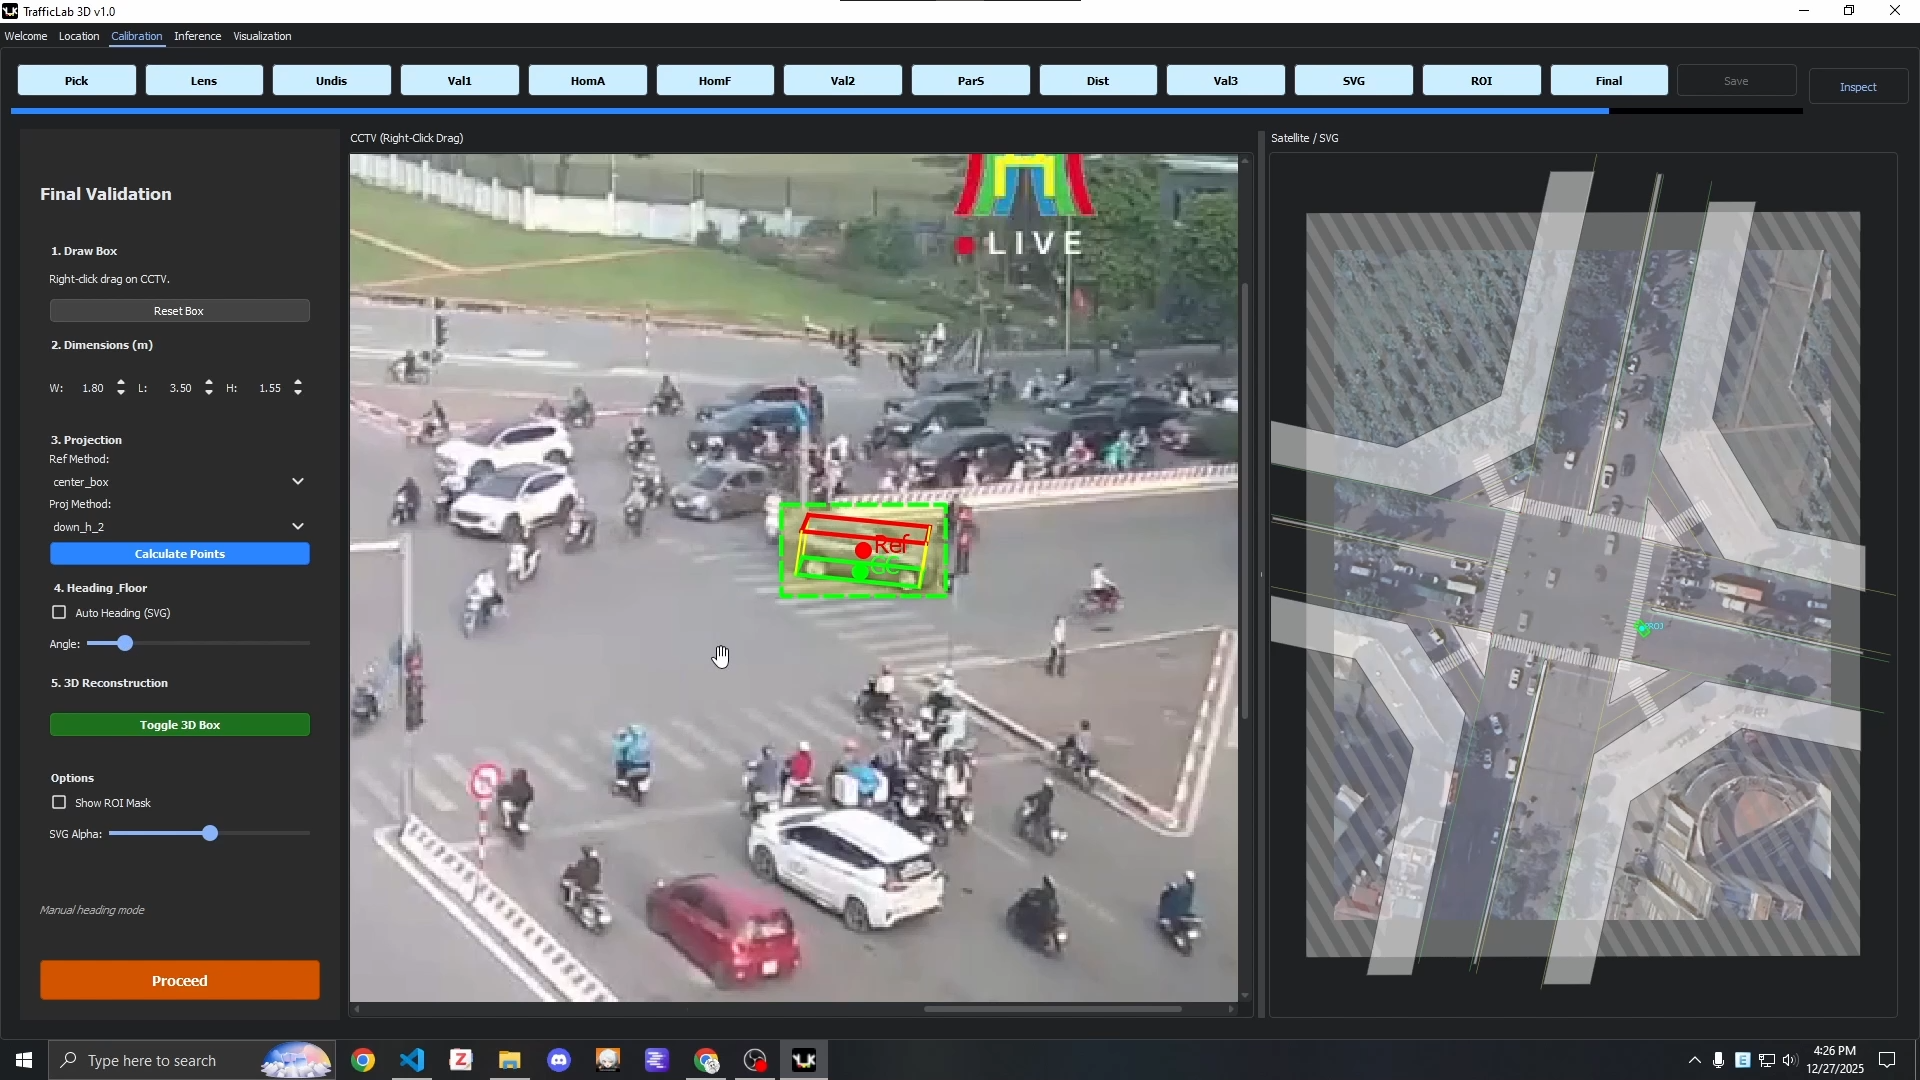
Additionally, importing vector SVG intersection diagrams and marking regions of interest (ROI) are supported to filter out false detections outside the roadway.
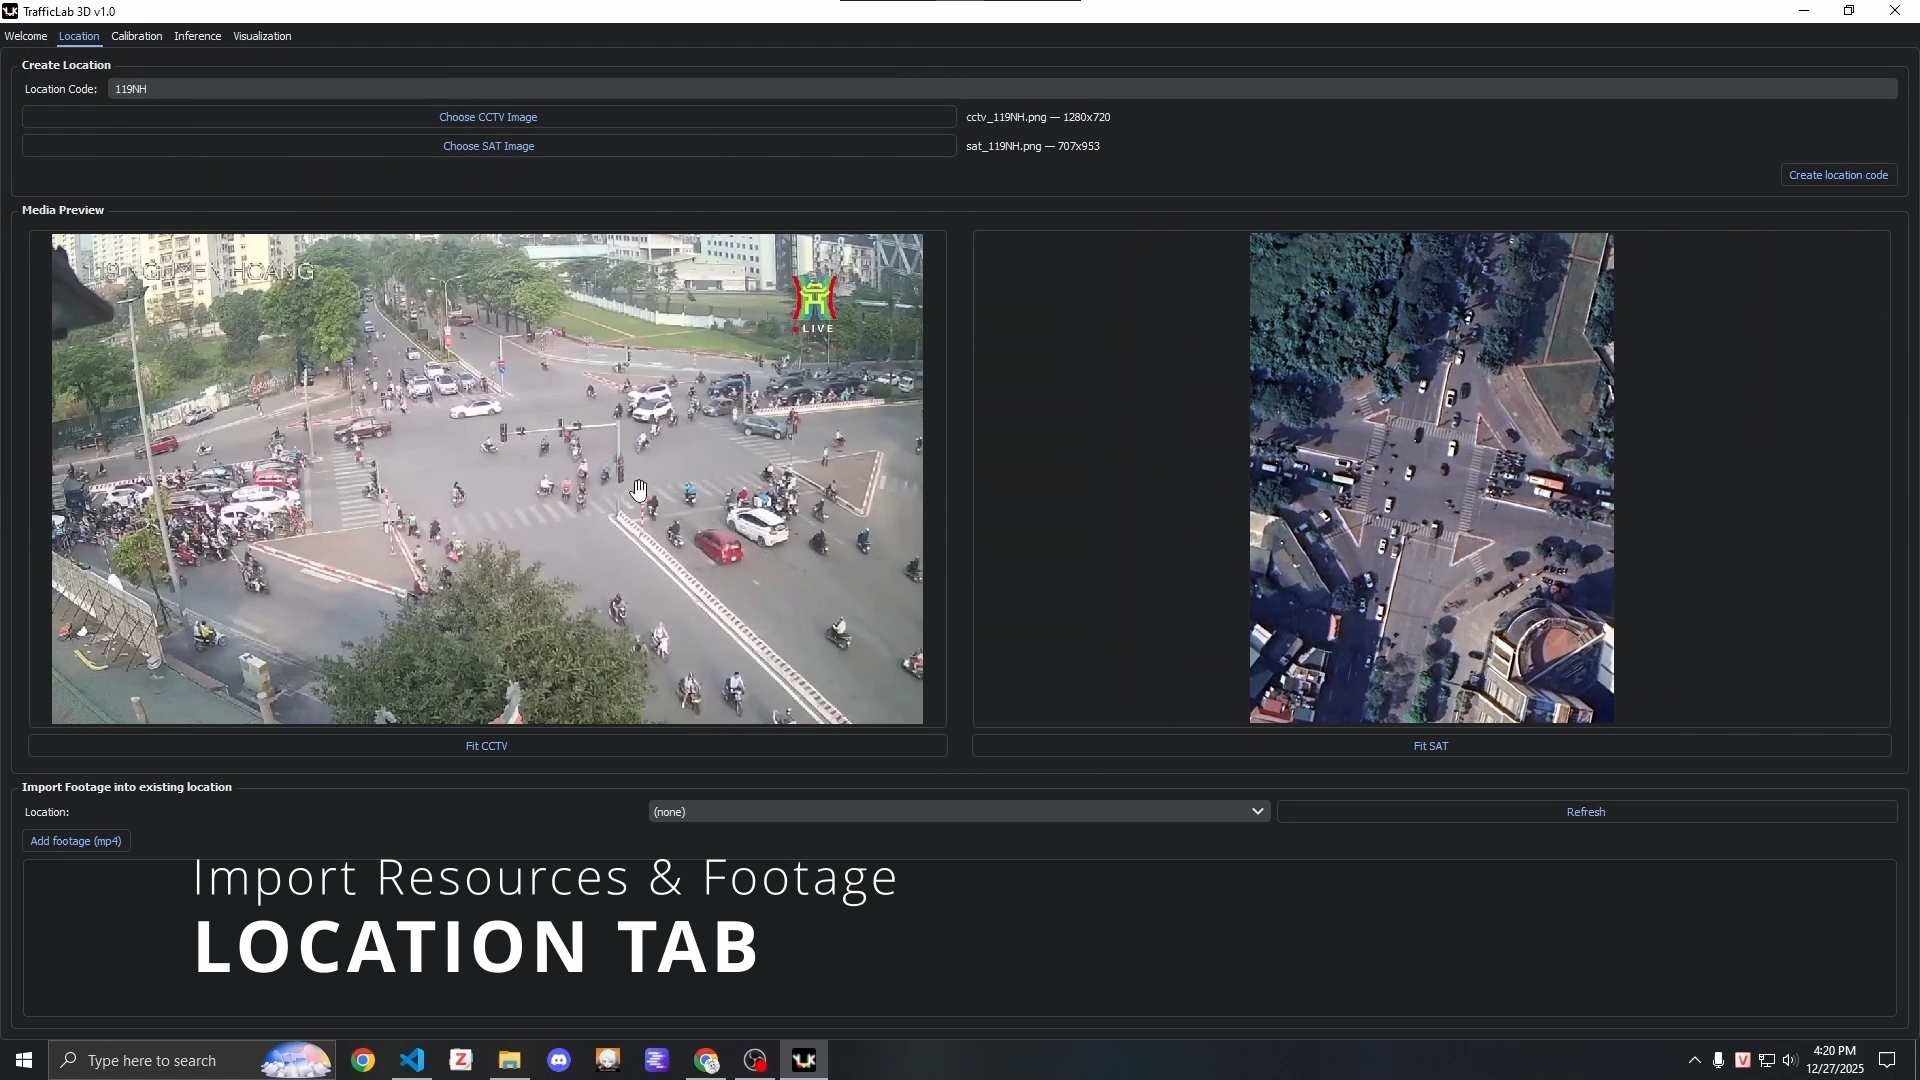
Inference and visualization
After configuring the geometry, you move to the inference tab. Computation is separated from rendering so the interface doesn't freeze when playing heavy scenes.
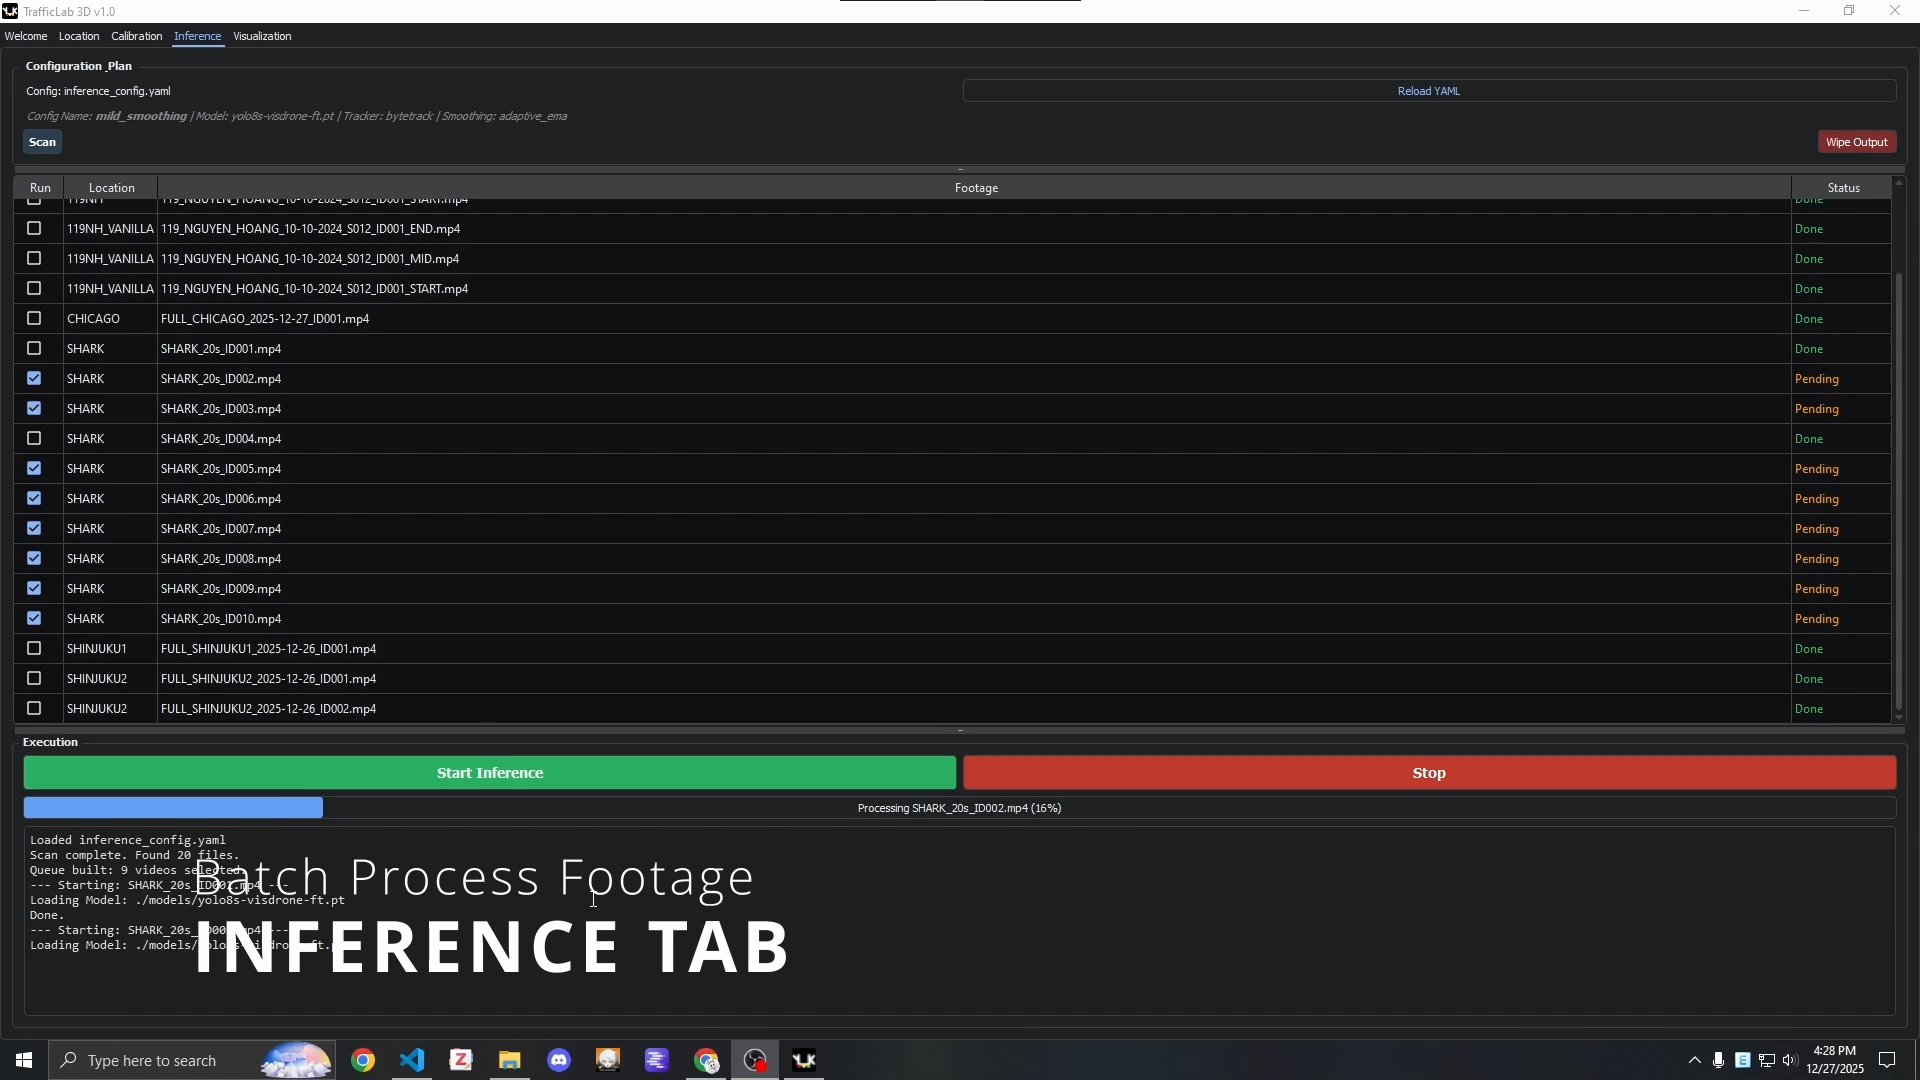
The neural network pipeline is configured via inference_config.yaml and prior_dimensions.json:
- YOLOv8 or YOLOv11 models in PyTorch format are used for object detection.
- Standard motion trackers are connected for tracking.
- Results are smoothed by kinematic filters that compute the direction and speed of each object.
All results are saved to compressed .json.gz files. They contain 3D bounding box coordinates, motion vectors, and timestamp associations.
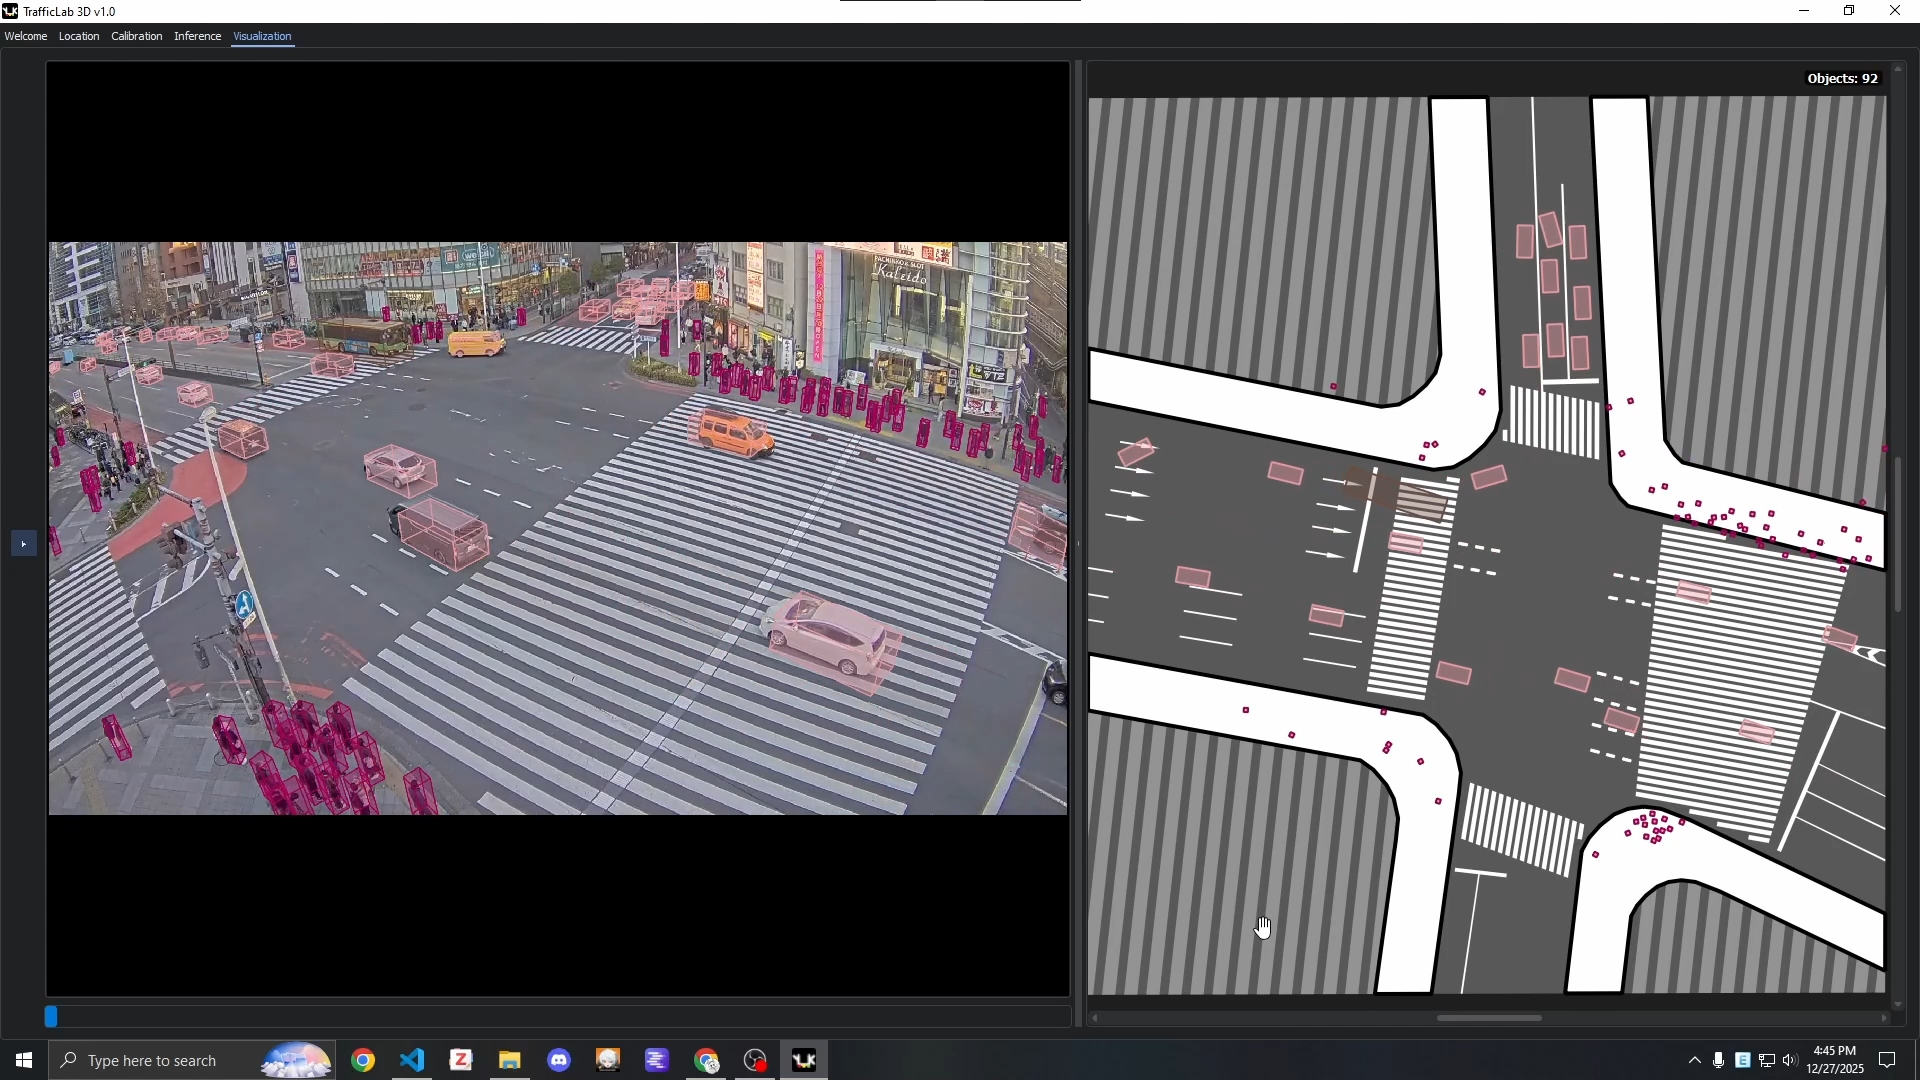
The final screen plays back the video stream side by side with the terrain map. On the left you see the camera feed with overlaid 3D traffic bounding boxes, and on the right — an intersection diagram with contact spots, heading arrows, and precise speed values.
How to run the project locally
To run it, you'll need a configured Conda environment with Python and computer vision libraries installed:
git clone https://github.com/duy-phamduc68/TrafficLab-3D.git
cd TrafficLab-3D
conda env create -f environment.yml
conda activate trafficlab
python main.py
The author uploaded pre-trained model weights to Google Drive, along with test folders with pre-calibrated intersections. If you don't want to spend time labeling your own cameras right away, you can download the test set and jump straight to inference and visualization.
The working directory structure is straightforward:
TrafficLab-3D/
├── location/
│   └── {location_code}/
│       ├── footage/
│       ├── cctv_{location_code}.png
│       └── sat_{location_code}.png
├── models/
├── output/
├── inference_config.yaml
└── main.py
Current limitations
The author honestly states in the README that the codebase is currently a monolithic prototype. There are obvious physical simplifications. For example, the system assumes a perfectly flat road plane with no elevation changes, and detections come from YOLO without strict adherence to a vehicle kinematic model (like a bicycle model), which can cause 3D bounding boxes to occasionally jitter when obscured by large buses.
Nevertheless, the calibration pipeline is well-designed. If you need a working foundation for smart city research, accident reconstruction, or traffic tracking from accessible data sources, TrafficLab-3D is definitely worth forking and exploring.
関連プロジェクト