How to Build a 3D Model Generation Pipeline in a Single Window with 3DGenStudio
Creating 3D assets with AI still feels like assembling a construction set with parts from different kits. First you generate an image in ComfyUI, then drag it to a third-party service like Tripo to get a three-dimensional mesh. Next you open Blender to fix the geometry or UV unwrap, and then go back to neural networks for textures. Constantly importing and exporting between five windows gets exhausting fast.
A developer with the username visualbruno decided to combine these steps. His project 3DGenStudio links visual pipeline management, a built-in mesh file editor, and direct ComfyUI integration into a single workspace.
Why a Separate Studio Interface Is Needed
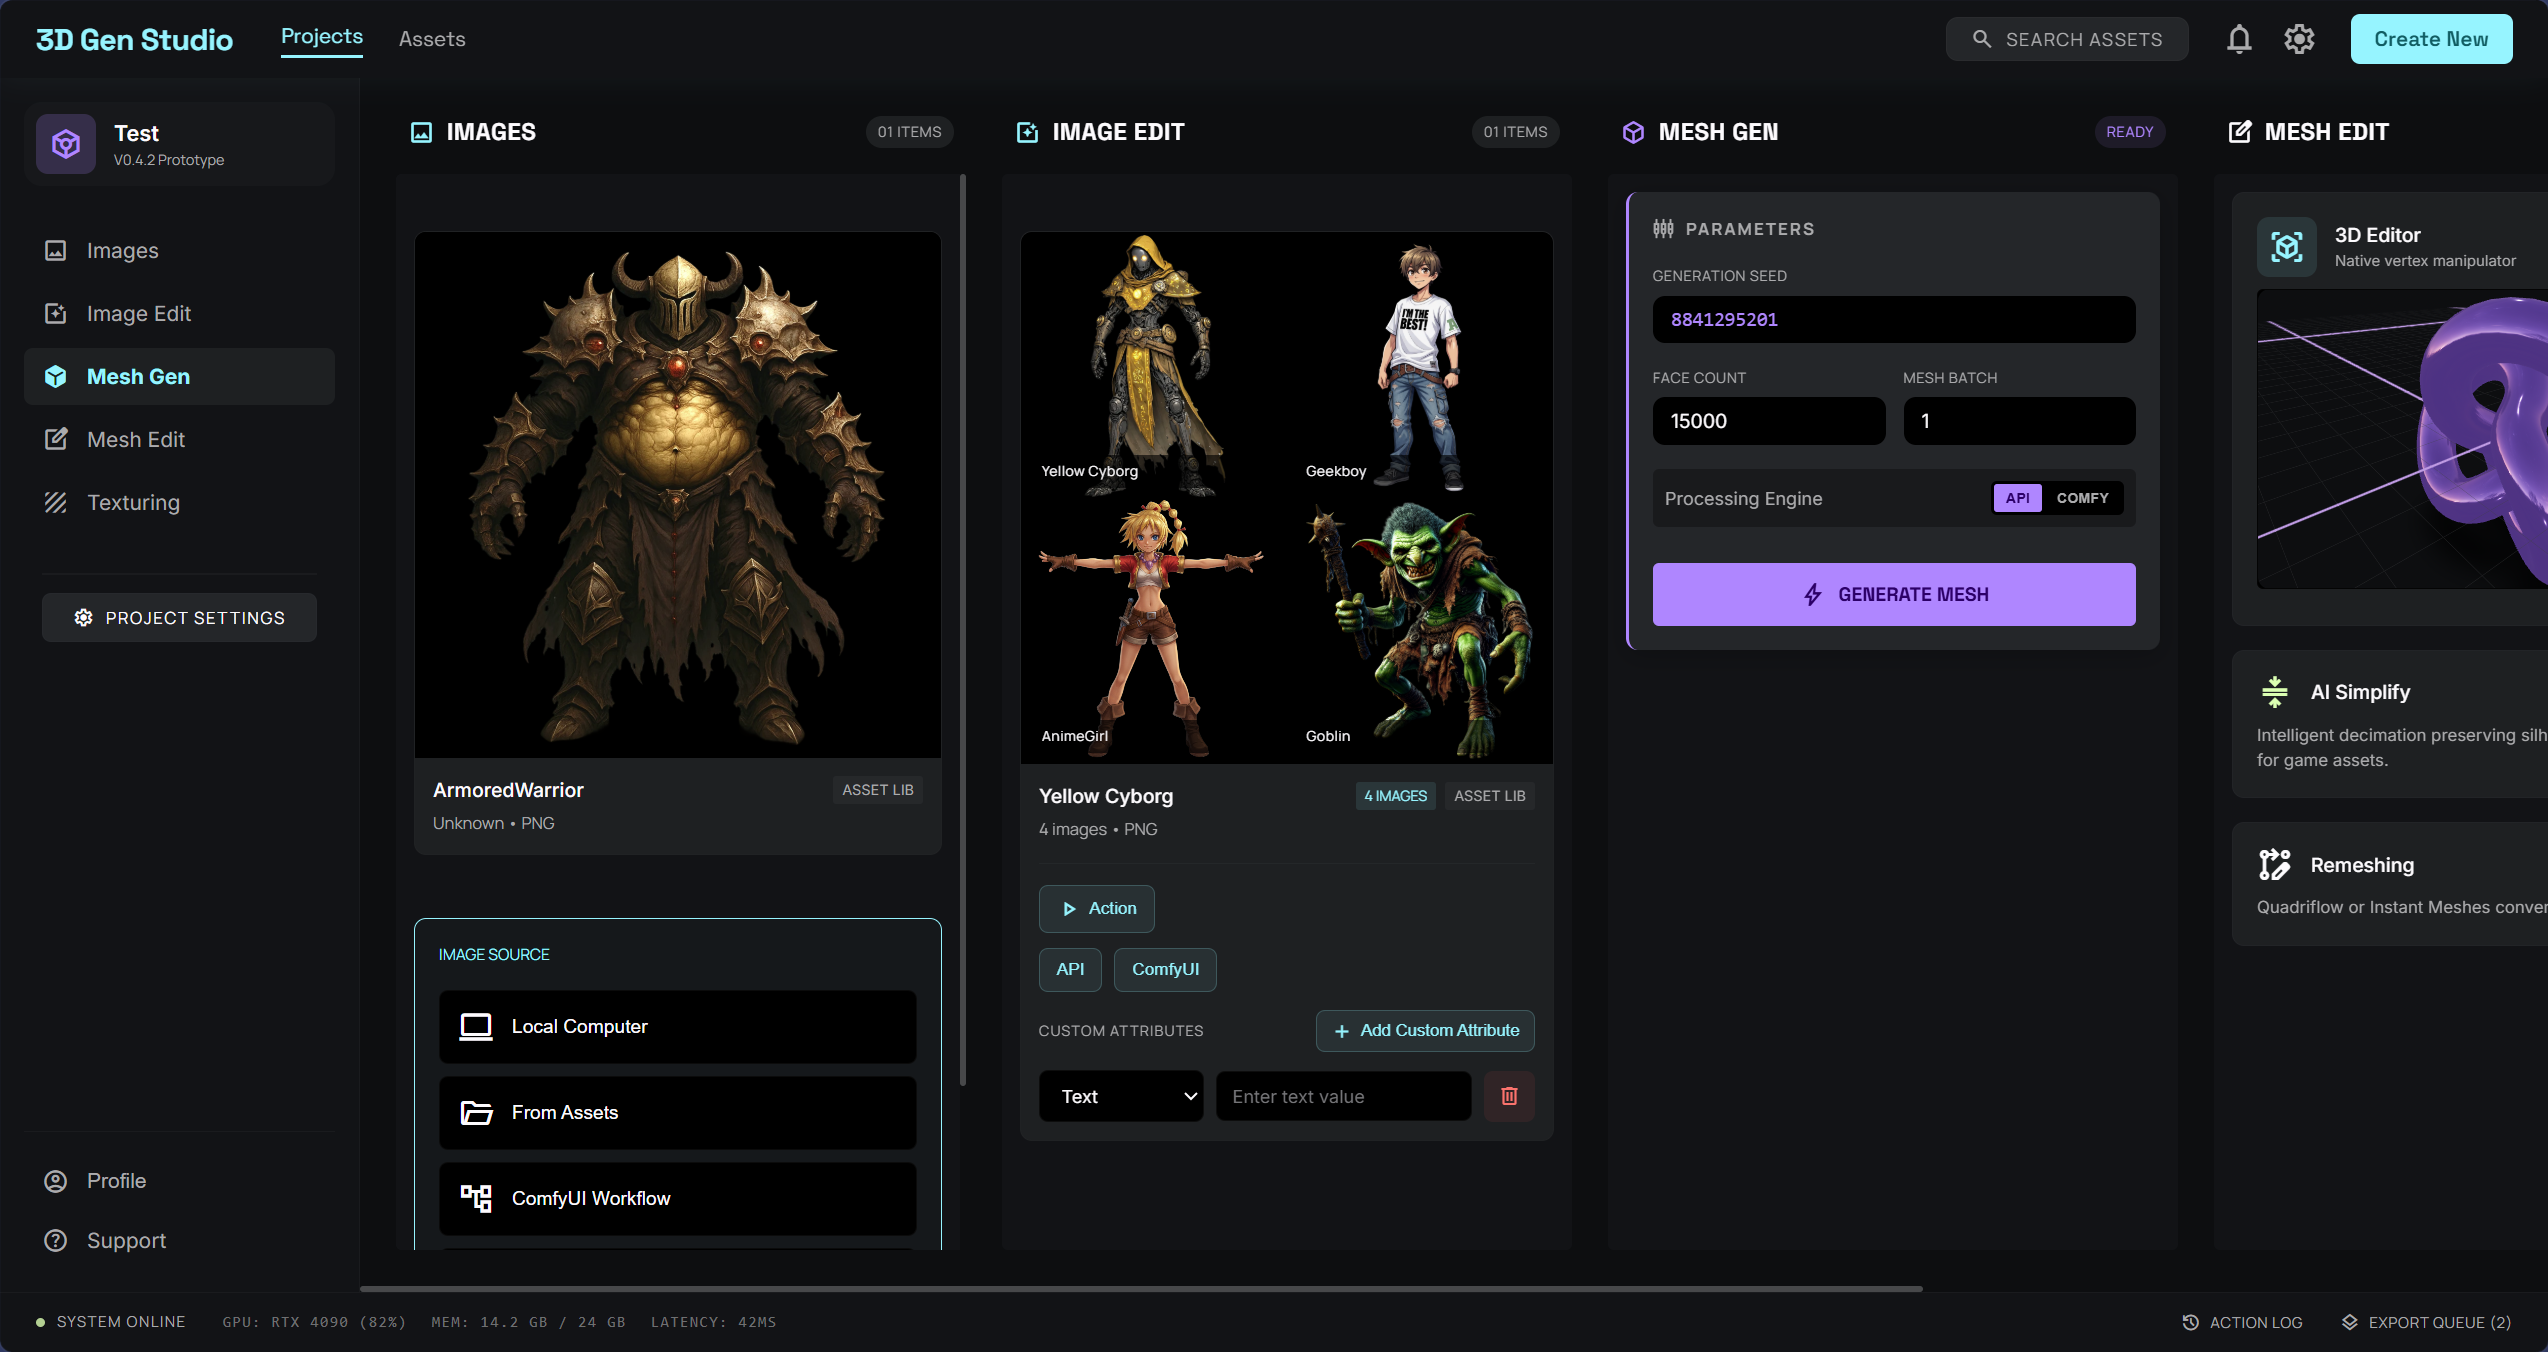
The core idea behind 3DGenStudio is eliminating the chaos of files, render variants, and workflow settings. Instead of a bunch of folders with names like mesh_final_v2_fixed.glb, you get a visual development environment where you can see the entire path of an object from the first text prompt to a finished model with animation.
The project is local. All source files, textures, and mesh versions are saved to your disk. There's no dependency on third-party clouds, and the data is easy to push to Git.
Two Modes for Working with a Project
Inside the app you can switch between two views.
Kanban Board
You advance an object's card through standard columns: image generation, image processing, 3D mesh creation, geometry refinement, texturing. At each stage, the required ComfyUI scripts or external APIs can be launched directly from the card.
Node Graph
If you prefer seeing connections graphically, the graph shows which specific image a particular mesh was generated from. Clicking a node opens the generation parameters, where you can immediately change settings and rerun the process.
Built-in 3D Editor Right in the Browser
The main surprise of the project is a built-in editor based on Three.js. It's not meant to replace Blender, but for quickly fine-tuning the results of neural networks.
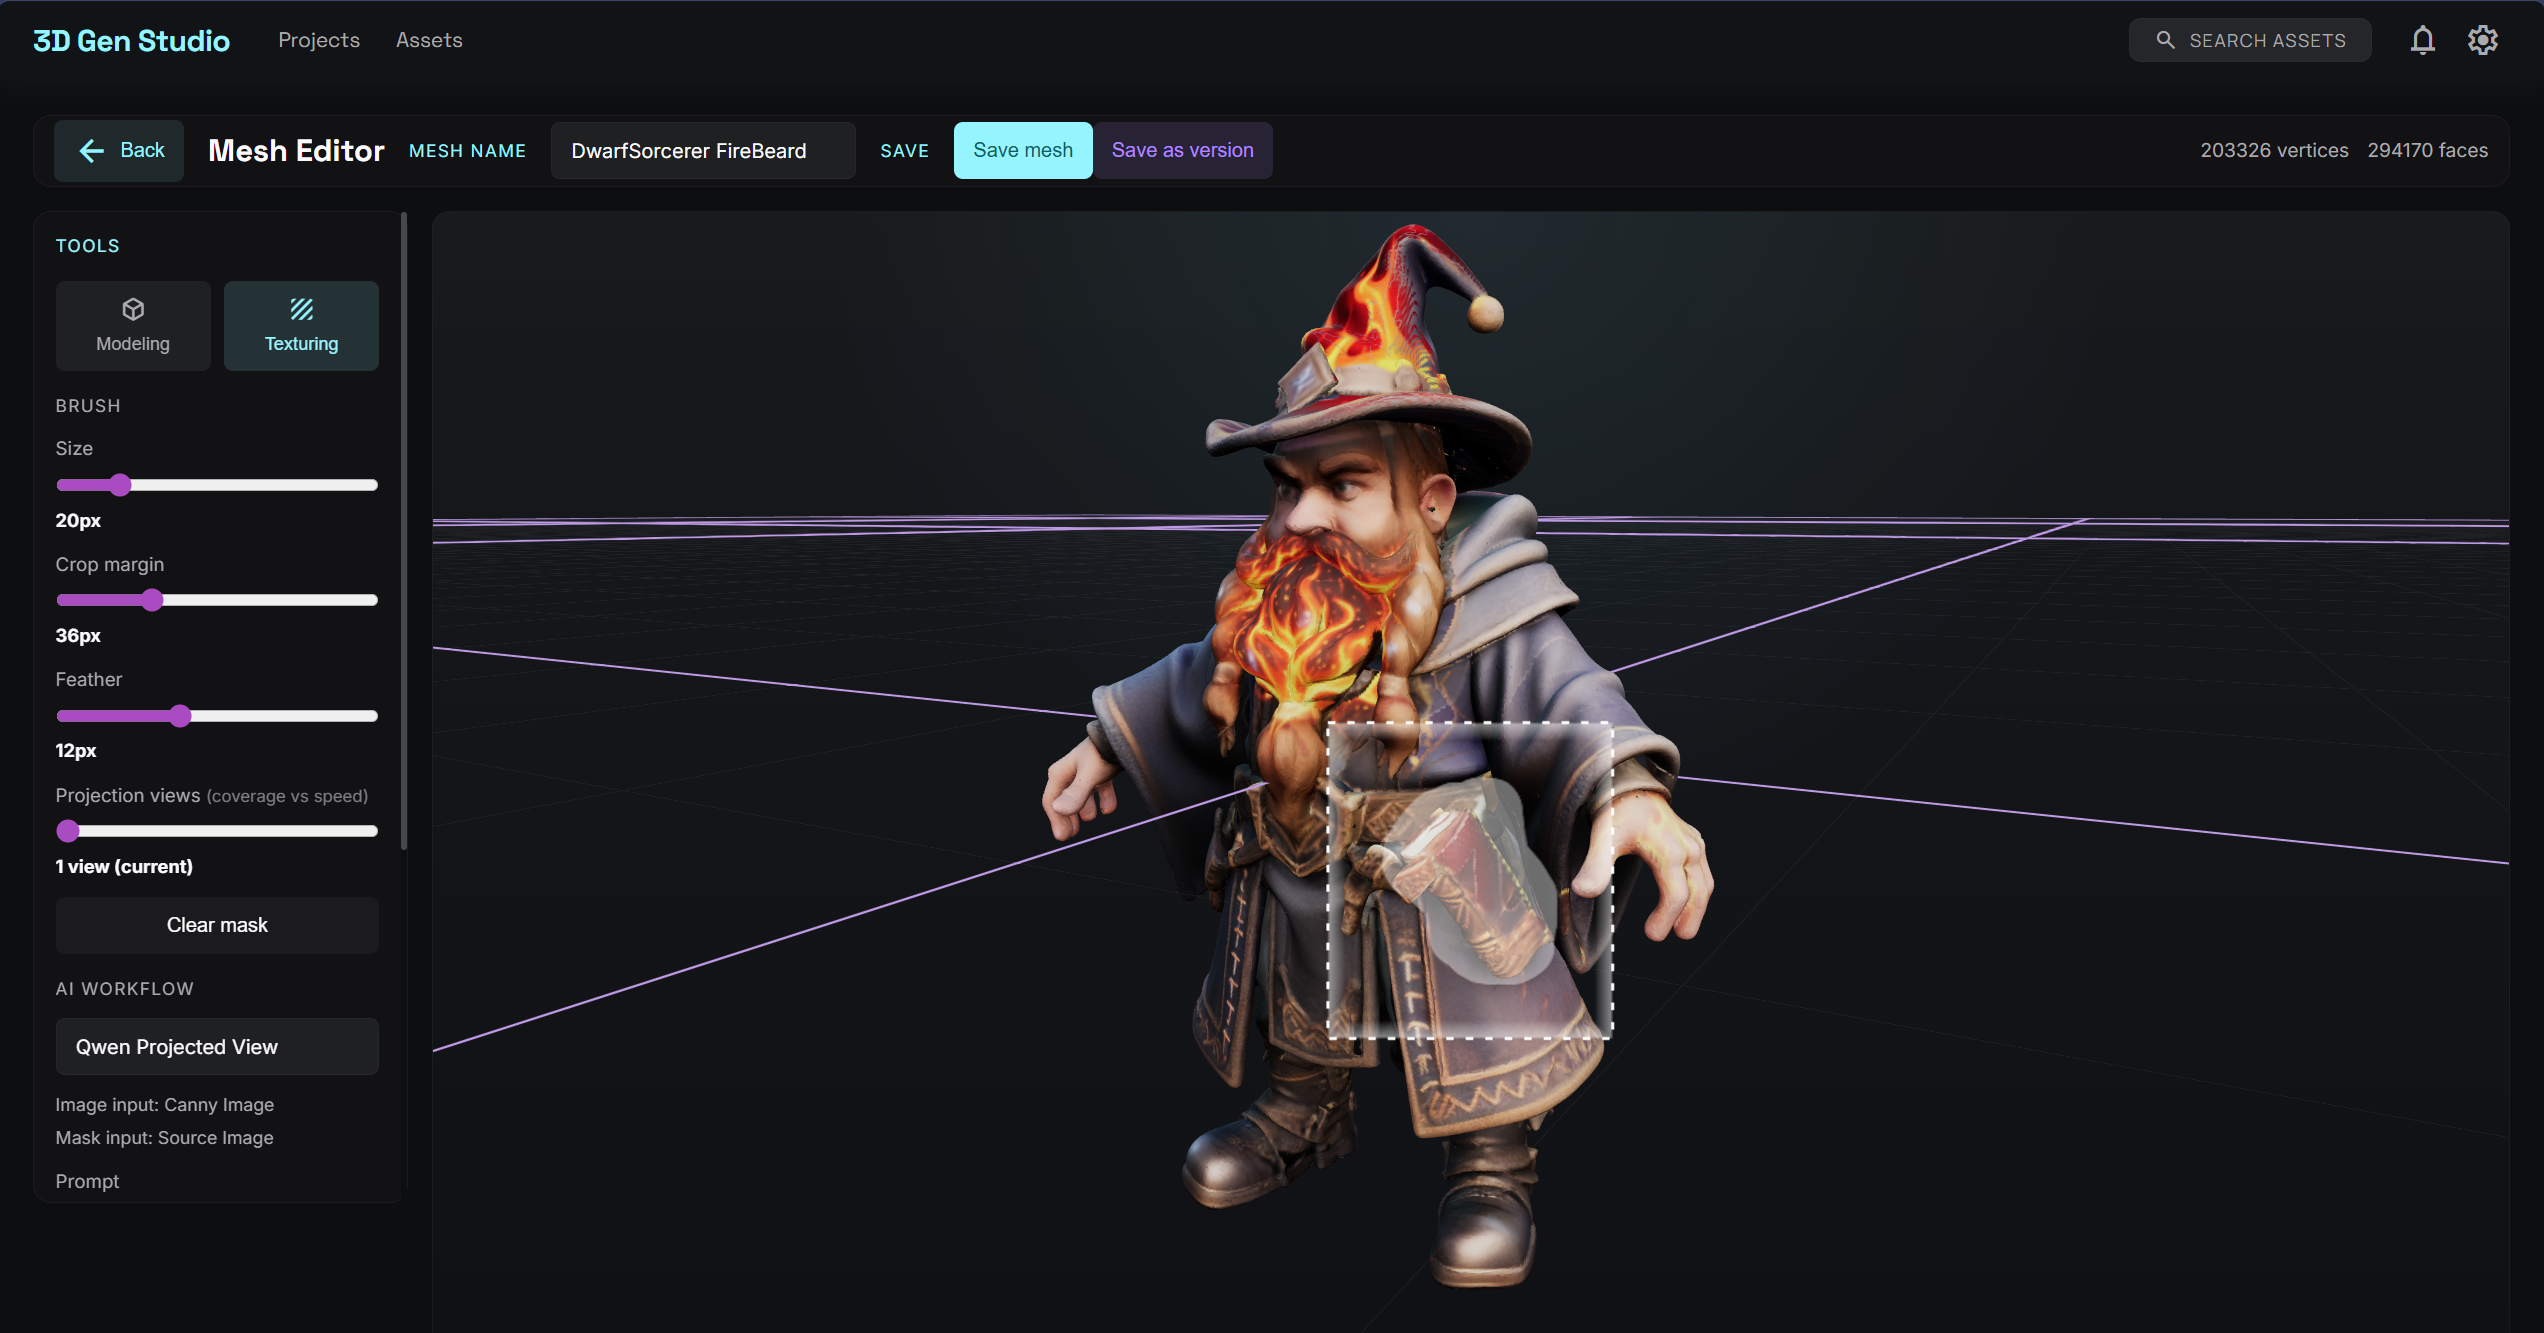
What the editor can do:
- Automatic UV unwrapping and retopology. Neural network meshes often produce a mess of polygons. The built-in script can clean up unwrapped edges and rebuild the mesh into a neater appearance.
- Auto Rig. The function builds a skeleton and binds skin weights based on the SkinTokens library.
- Texture projection and inpainting. You can rotate the model to the desired angle, paint over a problem with a mask, and send the frame to ComfyUI. The neural network will fill in the fragment, and the editor will project the finished piece back onto the 3D object.
- Basic sculpting and painting. There are familiar brushes for smoothing, building up form, and spot texturing.
Direct ComfyUI Integration
3DGenStudio can communicate with ComfyUI directly. You don't need to manually transfer prompts or reload masks. The app sends the required parameters to the ComfyUI API, retrieves the generated result, and attaches it as a child version to the current card.
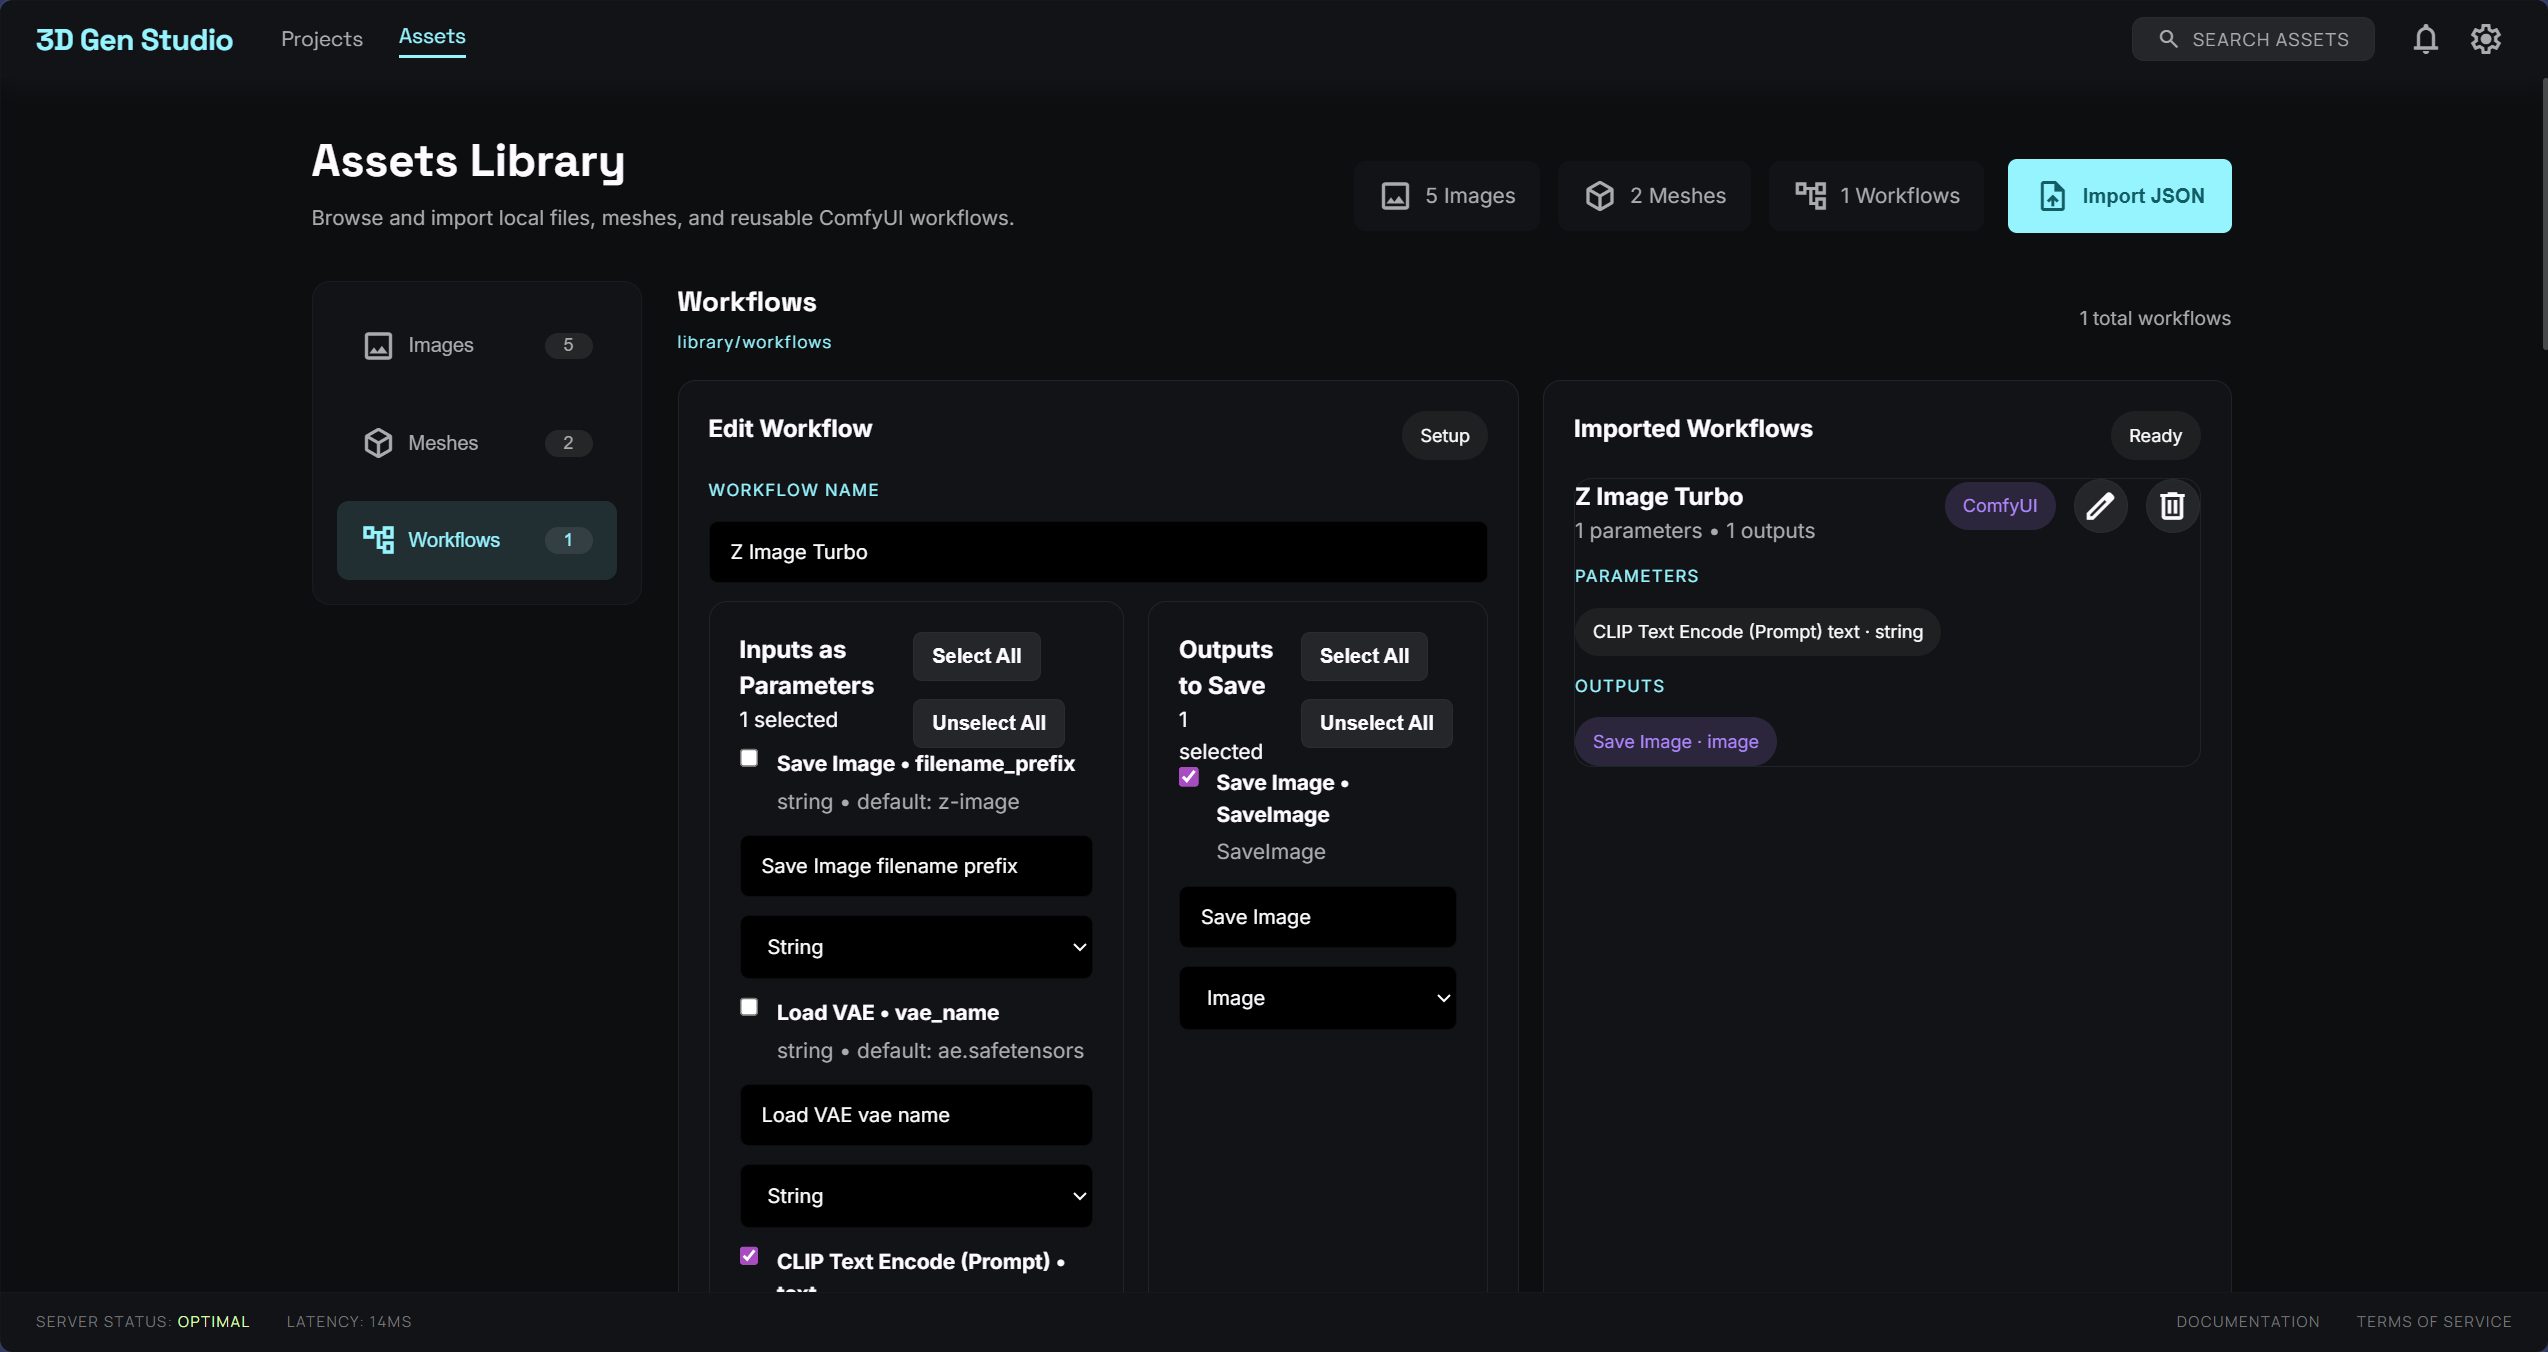
If you use cloud services like Tripo AI or Tencent Cloud, those can also be connected via external API endpoints.
Tech Stack and Launch
The project consists of three parts:
- Frontend: React, Vite, Three.js (
@react-three/fiber). - Backend: Node.js, Express, SQLite.
- Python server: handles heavy 3D processing, retopology, and auto-rig.
To launch, you'll need Node.js installed, a running ComfyUI, and a Python environment.
# Клонируем репозиторий
git clone https://github.com/visualbruno/3DGenStudio.git
cd 3DGenStudio

# Устанавливаем и запускаем клиент
npm install
npm run dev

# В соседнем терминале поднимаем python-сервер
cd python-server
python -m venv .venv
.venv\Scripts\activate
pip install -r requirements.txt
python main.py
After that, open http://localhost:3001 and specify your ComfyUI address in the settings.
The Bottom Line
At the time of writing, 3DGenStudio has just over 400 stars on GitHub. However, judging by the CHANGELOG, the author updates the project almost every day, adding new tools like Flux model support, Sam3.1 integration, and mesh optimizers.
Pros:
- Links scattered 3D generation tools into a clear workflow.
- Automates the routine of UV unwrapping, retopology, and rigging.
- All files are stored locally.
Cons:
- Requires deploying and maintaining multiple services at once (Node.js, Python, ComfyUI).
- The browser-based editor doesn't yet replace a full-featured 3D package for complex modeling.
If you're assembling assets for games or indie projects using neural networks, trying 3DGenStudio is clearly worth it. The project saves a ton of time on routine operations between generation and export to an engine.
Related projects