How to Build an Animatable 4D Avatar from a Couple of Photos Using CAP4D
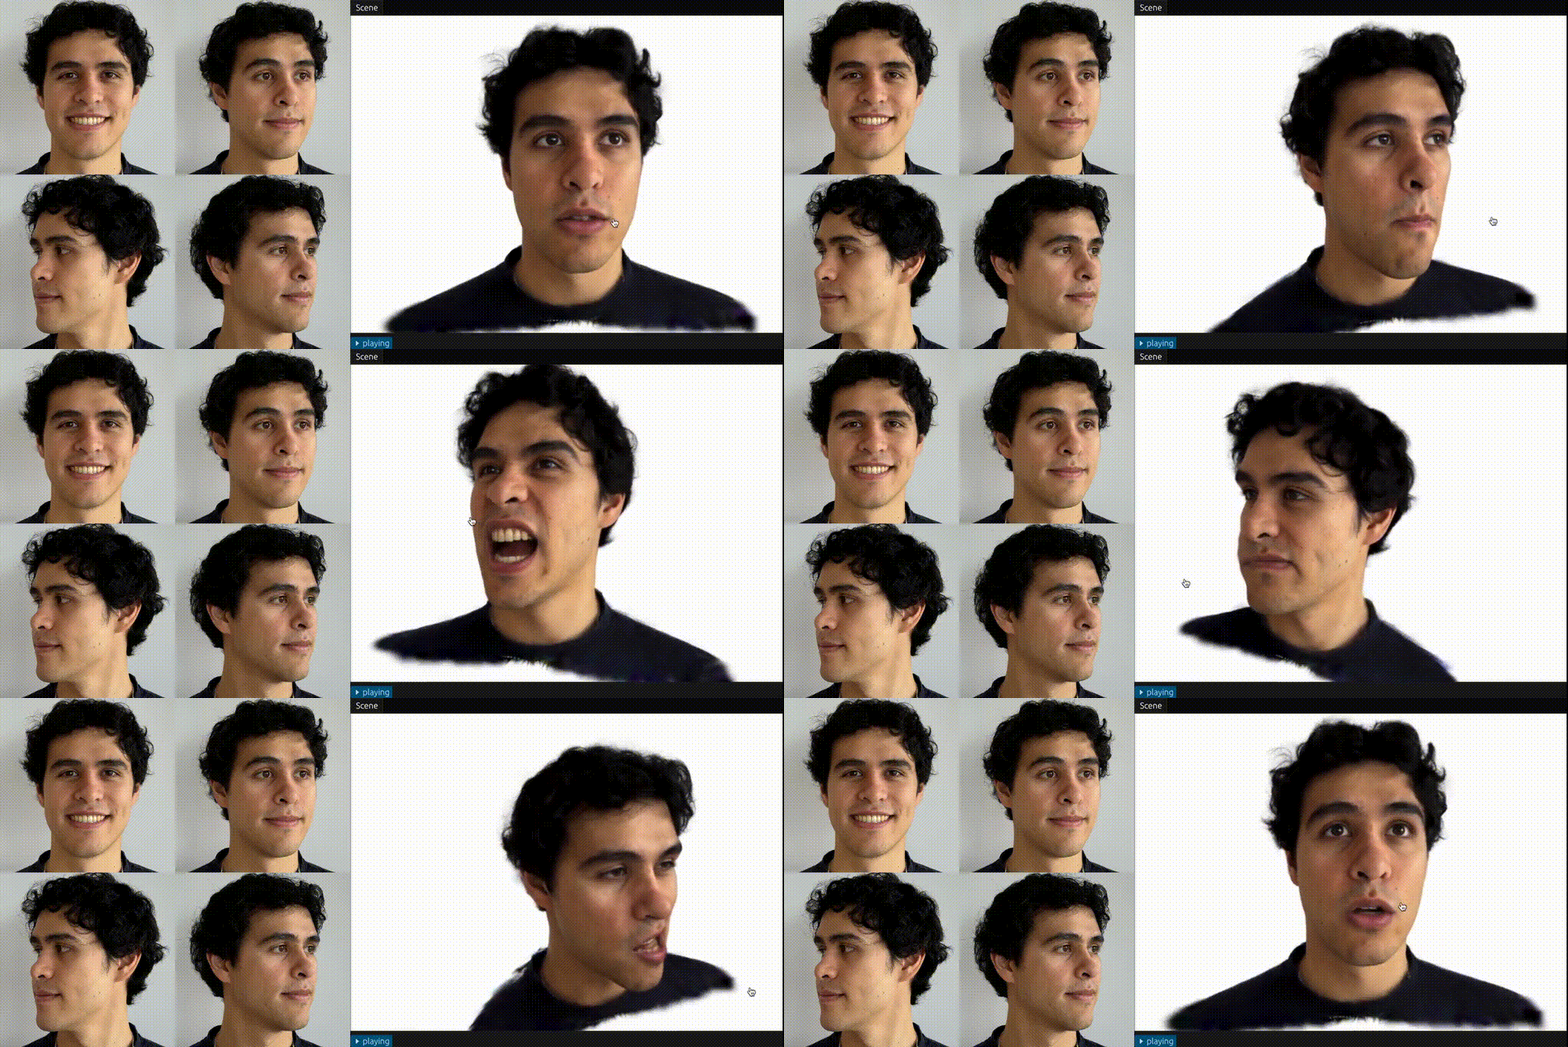
Creating controllable 3D heads from one or more photos usually hits the same wall. Either you get a flat mask without a back of the head and proper geometry, or you need a studio with twenty synchronized cameras to train the neural network.
A few days ago I stumbled upon the CAP4D repository from researchers at the University of Toronto and LG Electronics, accepted at CVPR 2025. The authors released a pipeline that takes an arbitrary set of photos or a short video from a monocular camera and builds a fully animatable 4D avatar based on 3D Gaussian Splatting.
What's under the hood
If we break down the architecture, the pipeline consists of four stages:
- Face tracking via FLAME. The script runs source frames through a 3D tracking tool (Pixel3DMM or the upcoming FlowFace), fitting head parameters to the FLAME parametric model.
- Multi-View Diffusion (MMDM). Here the authors took Stable Diffusion and ControlNet, fine-tuning them to generate consistent head views across different facial expressions and poses. The diffusion network literally "completes" the face at angles that weren't present in the original photos.
- Gaussian training (Gaussian Splatting). A representation based on GaussianAvatars is trained on the generated and source images. Gaussians are bound to the FLAME polygonal mesh, providing stable geometry during deformations.
- Animation and PLY export. The finished avatar can be driven by parameters from existing files or transfer facial expressions from any other video. The result is exported to a
.plyfile that opens directly in the browser via the Brush engine.
Installation and first hurdles
The README describes standard Conda environment setup, but there are a couple of spots where it's easy to stumble:
git clone https://github.com/felixtaubner/cap4d/
cd cap4d

conda create --name cap4d_env python=3.10
conda activate cap4d_env

pip install -r requirements.txt
export PYTHONPATH=$(realpath "./"):$PYTHONPATH
Next, you need to manually build PyTorch3D with CUDA support:
export FORCE_CUDA=1
pip install "git+https://github.com/facebookresearch/pytorch3d.git@stable"
To work with the parametric model, you'll need to register on the FLAME website (free for non-commercial use) and set environment variables:
export FLAME_USERNAME=your_flame_user_name
export FLAME_PWD=your_flame_password

bash scripts/download_flame.sh
bash scripts/download_mmdm_weights.sh
If the download script fails due to NumPy version issues, the repository kindly provides a scripts/fixes/fix_flame_pickle.py utility.
Quick test on ready-made characters
To verify that all CUDA kernels and libraries are properly installed, the authors added a test run:
bash scripts/test_pipeline.sh
If a video of Nikola Tesla renders in examples/debug_output/, your environment is set up correctly. Next, you can build the ready-made examples (Tesla, Lincoln, or the repository author Felix):
bash scripts/generate_tesla.sh
The script will output an animation file exported_animation.ply. You can upload it to their web viewer on GitHub Pages and rotate the camera with your mouse directly in the browser window at 60 FPS.
Running on your own data
When you want to bring your own face or a character from video to life, the process is a bit more involved. You'll need the Pixel3DMM repository for monocular tracking:
export PIXEL3DMM_PATH=$(realpath "../PATH/TO/pixel3dmm")
export CAP4D_PATH=$(realpath "./")
bash scripts/install_pixel3Dmm.sh
Next, run tracking on the folder with photos and the target video from which expressions are extracted:
# Трекинг исходных фотографий
bash scripts/track_video_pixel3dmm.sh examples/input/my_face/cam0/ examples/output/custom/reference_tracking/

# Трекинг видео-драйвера с движениями
bash scripts/track_video_pixel3dmm.sh examples/input/animation/driving.mp4 examples/output/custom/driving_video_tracking/
Generate synthetic views with the diffusion model:
python cap4d/inference/generate_images.py \
  --config_path configs/generation/default.yaml \
  --reference_data_path examples/output/custom/reference_tracking/ \
  --output_path examples/output/custom/mmdm/
Fit Gaussians to the geometry:
python gaussianavatars/train.py \
  --config_path configs/avatar/default.yaml \
  --source_paths examples/output/custom/mmdm/reference_images/ examples/output/custom/mmdm/generated_images/ \
  --model_path examples/output/custom/avatar/ \
  --interval 5000
For those who don't want to call steps individually, the authors packaged the entire pipeline into a single bash script:
bash scripts/generate_avatar.sh examples/input/my_face/cam0/ examples/output/my_avatar/ default examples/input/animation/driving.mp4
Hardware and gotchas
The pipeline is resource-intensive. The MMDM stage utilizes all available GPU, consumes a fair amount of VRAM, and requires 64 GB of RAM. On a single consumer GPU, image generation can take a couple of hours.
The second nuance is related to tracking. Currently, the main script relies on the third-party Pixel3DMM, which sometimes fails on complex angles. The authors trained their diffusion weights with annotations from FlowFace, but the FlowFace module itself is promised to be released in the repository soon. Because of this, custom generations may look slightly less sharp than the official demos.
Who this project is for
If you're working on neural rendering, digital avatars for games, animation for indie projects, or just exploring 3D Gaussian Splatting, the CAP4D code is definitely worth checking out. It demonstrates nicely how to combine 2D diffusion with a 3D representation through the strict FLAME parametric mesh, bypassing the problem of insufficient viewpoints.
For a quick start, I recommend first playing with the ready-made presets with Lincoln and Tesla to evaluate the web renderer performance, and only then move on to building custom pipelines on your own dataset.
Related projects